When writing LabLogs or Reports you will want to include an image of the Time Trend graphs or XY Scatter graphs.
If you already have your image saved, and just want to add a screenshot to your Lablog, then click here.
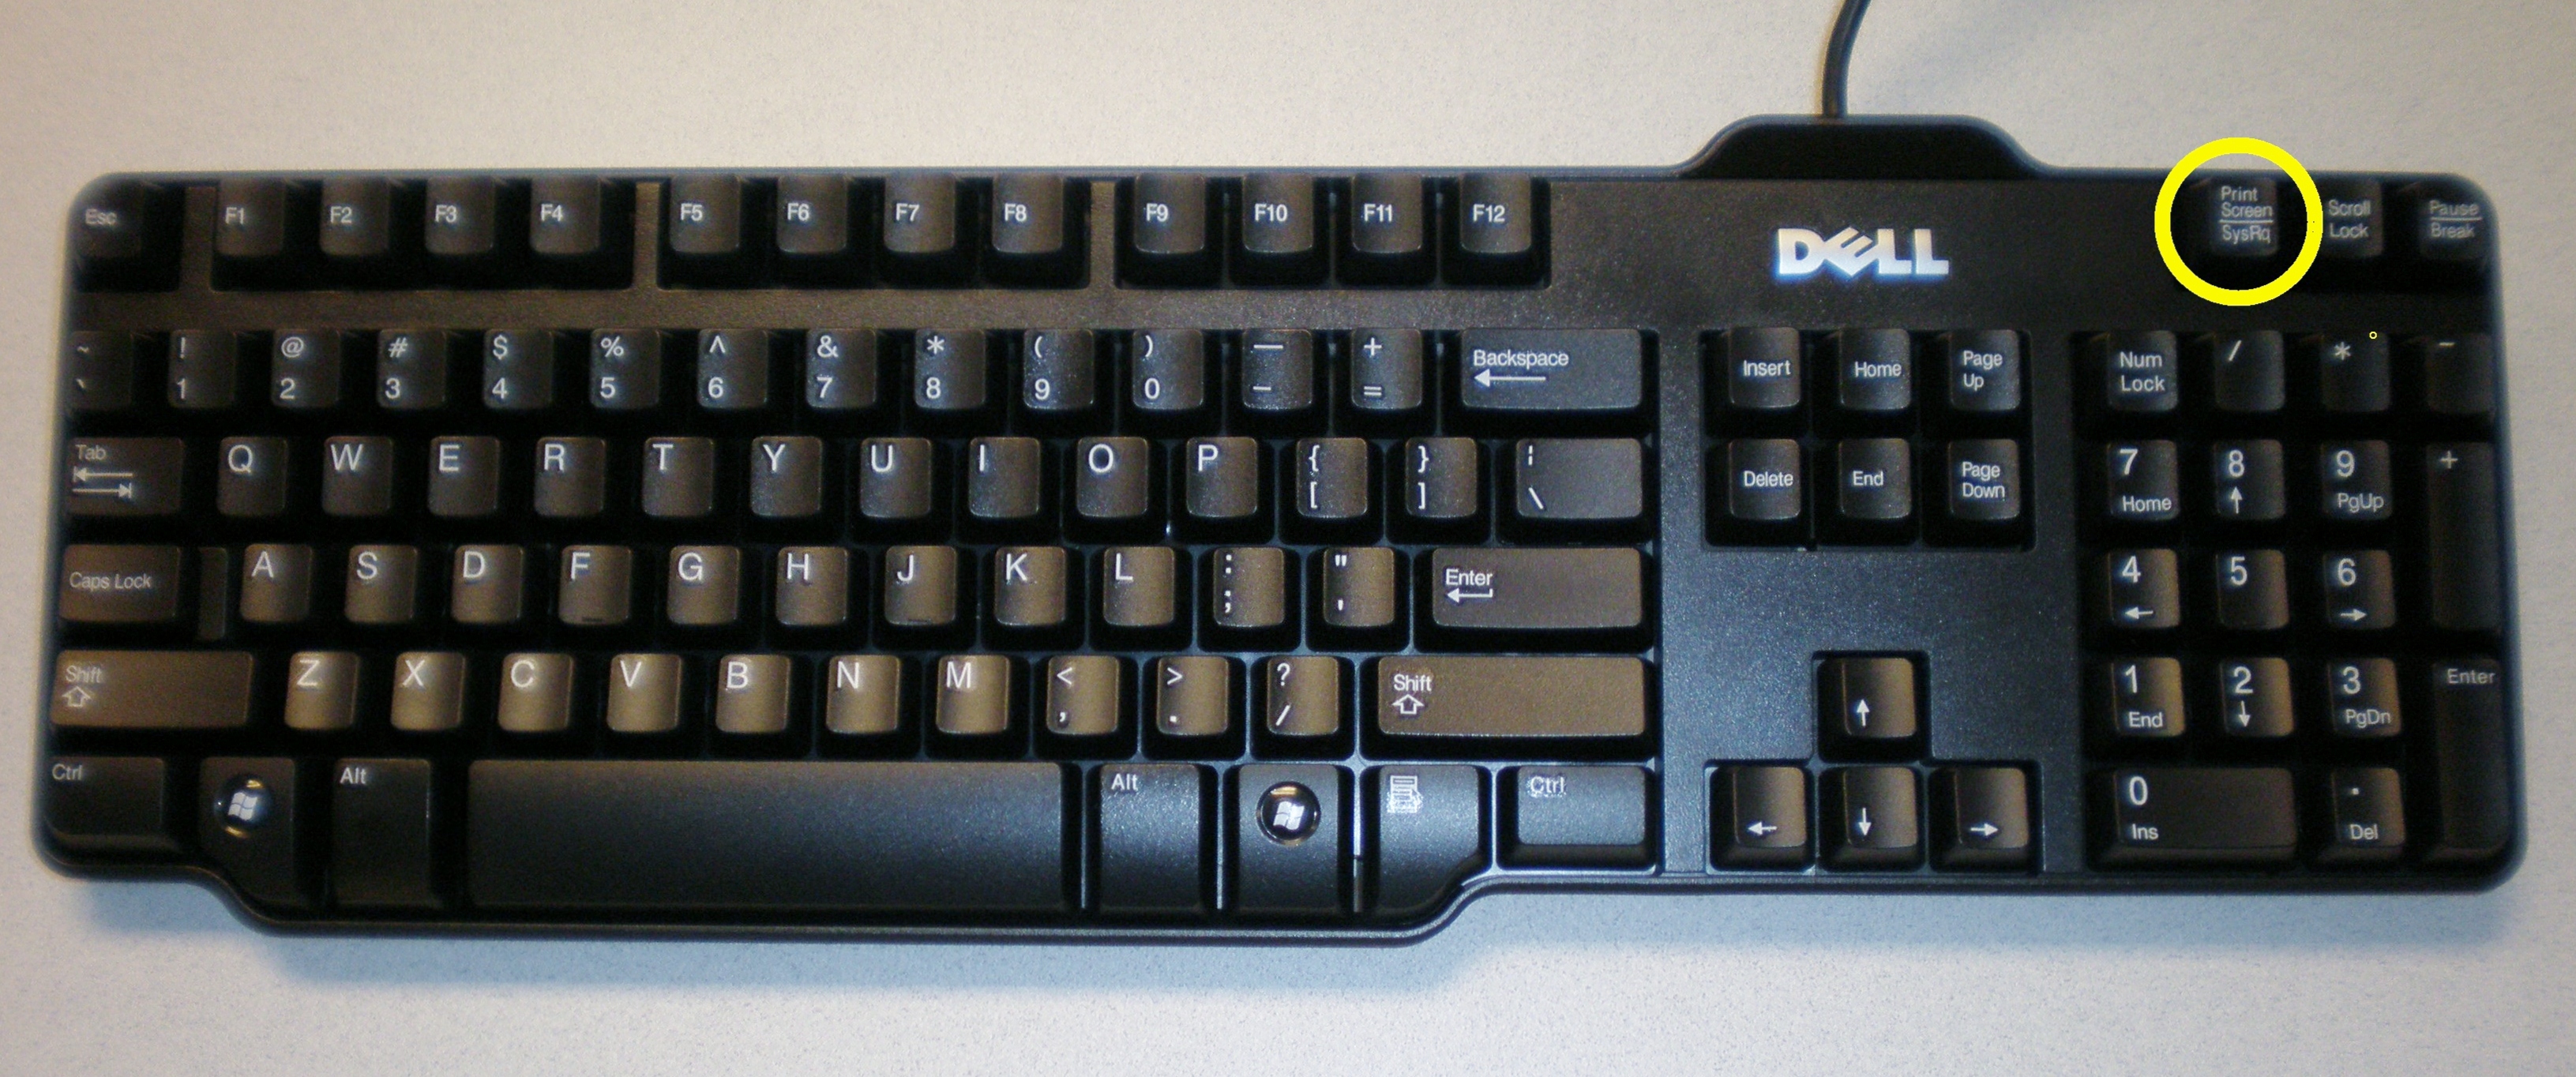
The best way of taking a screenshot would be to use the ‘Print Screen’ button (PrtScn) which is located above the ‘Insert’ or ‘Delete’ key on most PC Keyboards and above ‘Backspace’ on Laptops.
PrtScn button will capture an image of the screen. You will then need to ‘Paste’ (Ctrl+V) into a document or Paint program, if you can paste to a Paint programme you’ll be able to save the image as a jpeg and use it when writing your reports.
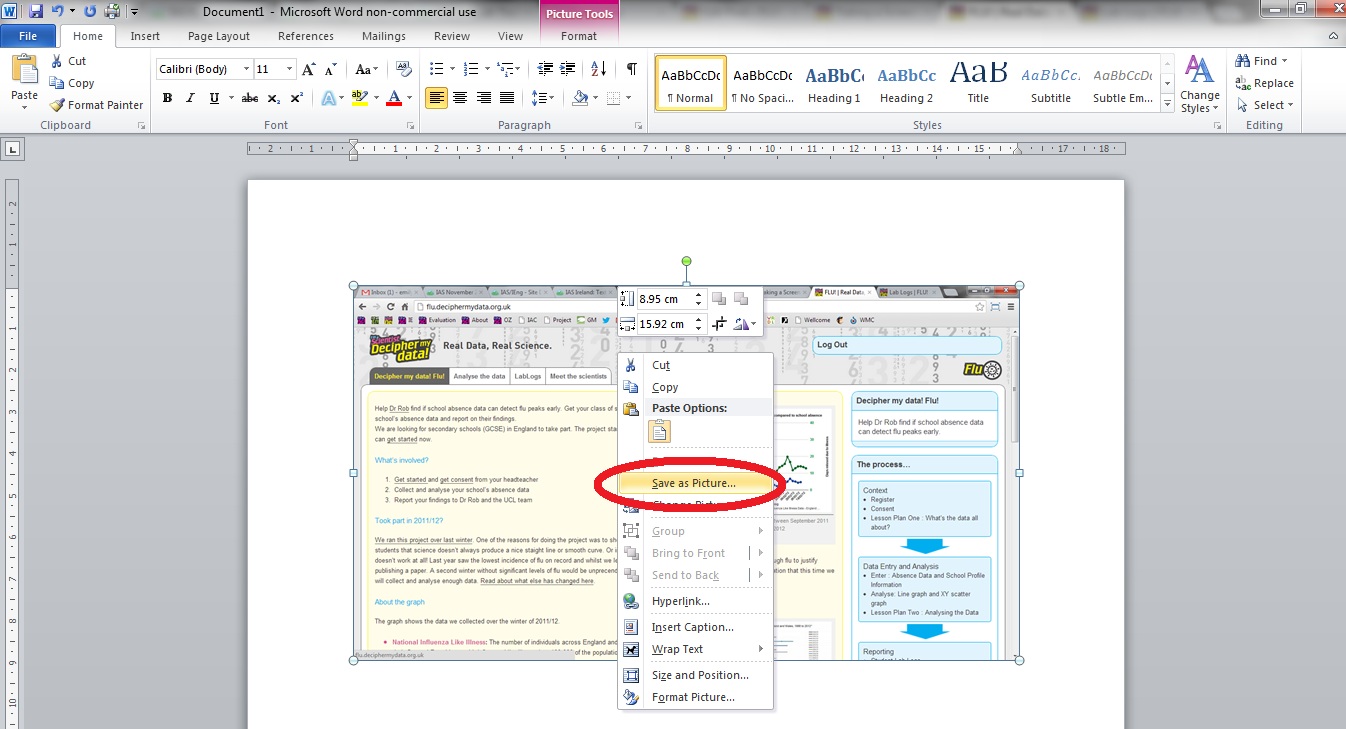
You can save your image in Word if you don’t have access to a Paint program. Paste the screen capture into a Word document and right click on it. You should see a ‘Save as Image‘ option, click that, then save the image as a JPEG File Interchange Format.
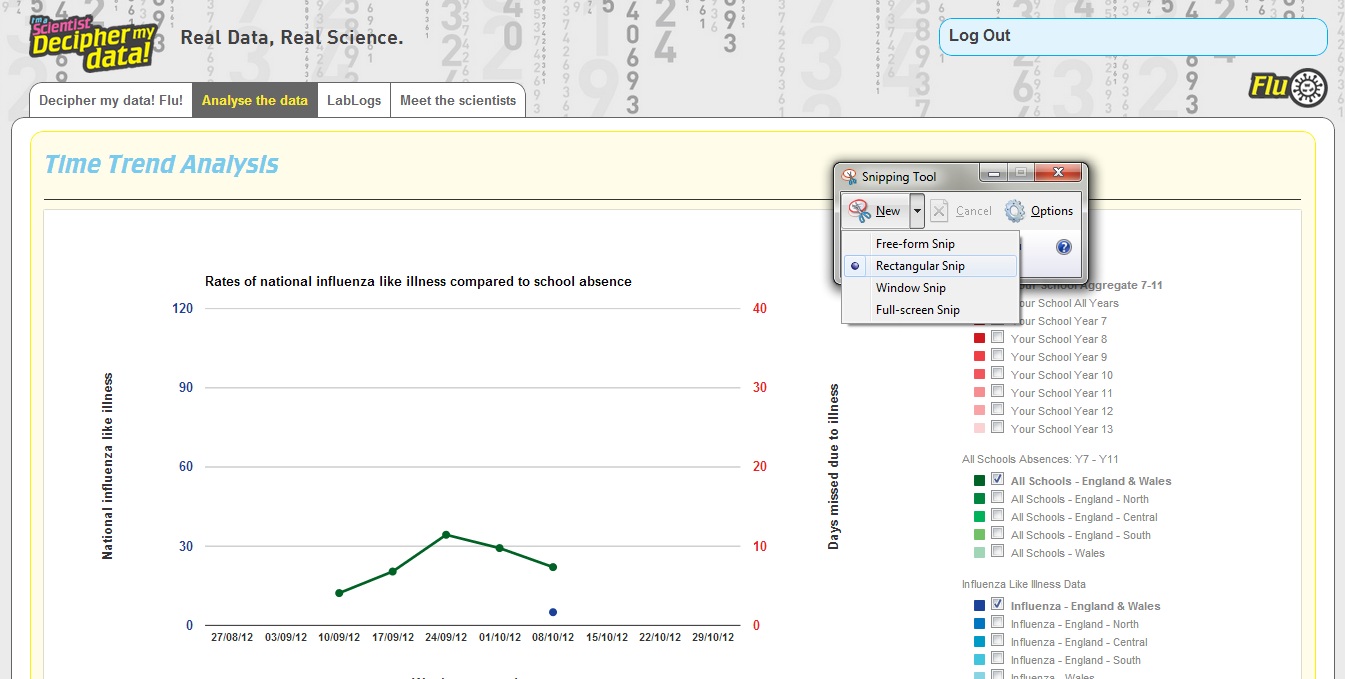
The best and easiest way to get a capture would be to use a tool which will allow you to ‘grab’ or ‘snip’ a specific part of the page. If the tool isn’t directly in your menu, just do a quick search and it should appear. In Windows it’s called ‘Snipping Tool‘
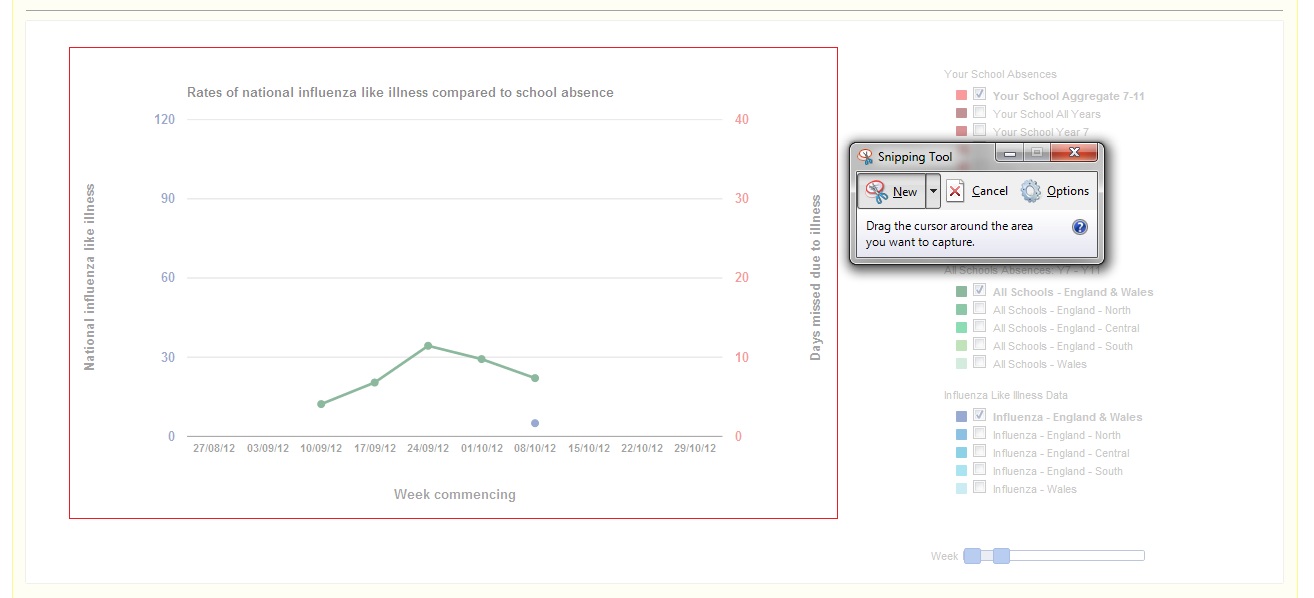
Select the area you want to capture and it will appear in a window for you to edit.
Remember to save the image capture as jpeg so you can use it later in your reports.
Adding your screenshot to a LabLogs
To add an image to your LabLog, you’ll first need to make sure you’re logged in to the site!
You’ll need to click on the ‘Upload/Insert’ button.
A box will appear asking you to either ‘upload’ or ‘drop’ your image from your computer on to the site.
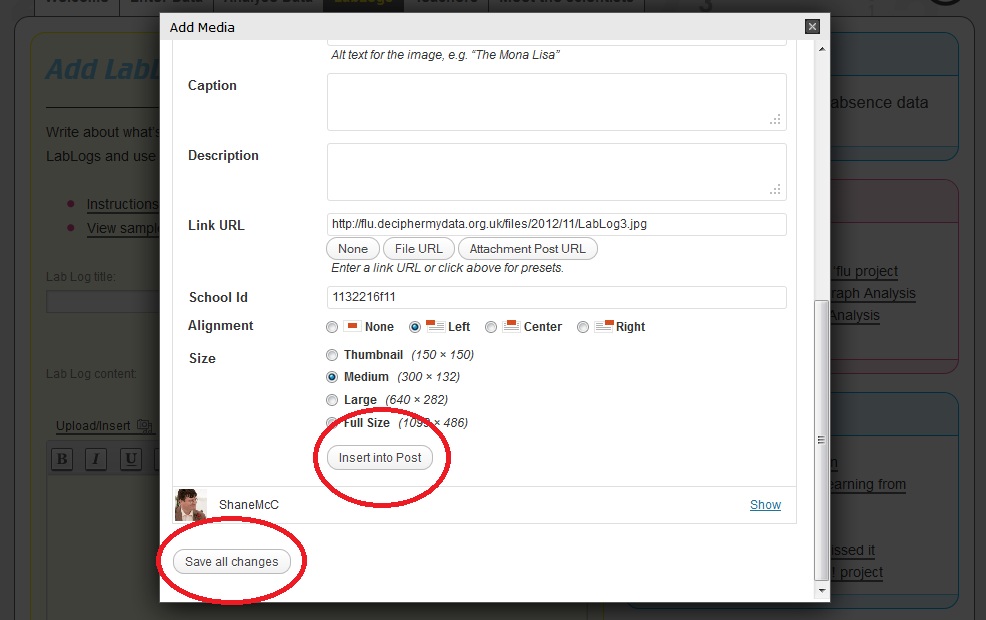
Once your image has been uploaded on to the site, make sure you “INSERT INTO POST” and then “save all changes”
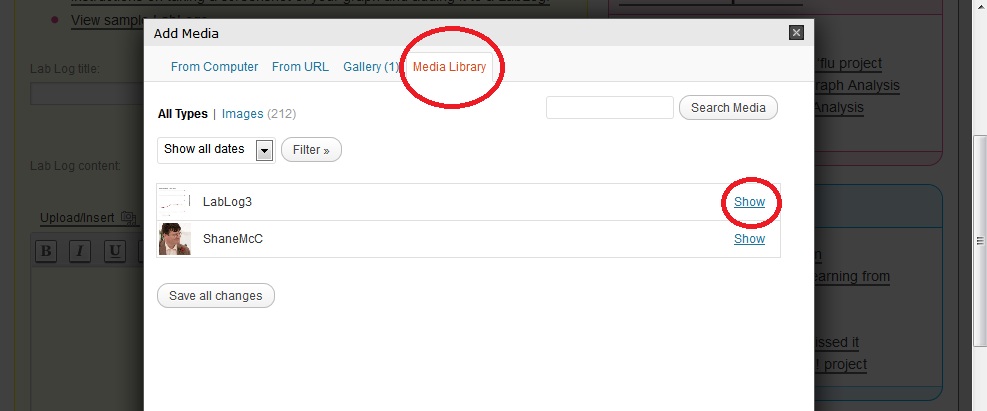
Alternatively you might already have an image uploaded, and just need to find it on the site, in which case – click on the Upload/Insert icon and click on ‘Media Library‘.
Remember to ‘Insert into post” and “Save all changes”.
You should now see your image, add some text and remember to click ‘submit’ so that everyone can see it!
Once you’ve clicked ‘submit’ you’ll be taken back to the LabLog page, and you should see a text box with “Your LabLog has been submitted for moderation. It will be published as soon as possible.” – When it’s been checked, it’ll be live on the site, for all to see!
If you’re using an Apple Mac, or an iPad , the commands may be slightly different, click here for more information.


